
Web Analytics using Umami - Open Source alternative to Google Analytics.
Open Source self-hosted Web Analytics


🙇 First of all, why Analytics ?
Suppose, you have a company that provides courses digitally(like web design, blockchain development, etc ..) or you have an e-commerce store. You will probably need to know what exactly you have to put in front of your audience. It's clear that you need to boost your profitability to survive in the ecosystem. You have to retain your customers and improve regularly.
Here, retaining your customers and getting them to pay for the product is the key to success. So here is the secret sauce to keep track of your customer's needs, Web Analytics.
Web Analytics is the measurement/analysis of the data that can be used to improve user experience. It can help you understand the user behaviour on your website and track growth. With Web Analytics tools, you can get data like page views, redirects, from which country the users are visiting, etc.
Page Views - Measuring traffic on a website can help you know:
- What exactly the user is looking for?
- From where they are coming from?
- How much traffic is there on any specific day(like if you were giving some discount on a specific day, what was the increase in traffic).
- The average time a user spends on the website.
Bounce Rate - higher the bounce rates = less user engagement.
- This can happen if the user found it hard to navigate the website(bad UX).
- Less quality content can be one of the reasons.
User's location
- Can be useful to run different campaigns in different areas.
- Also, it can help in optimizing the product as per demand in different areas.
🎯 But how to get web analytics ?
There are tons of free and paid services providing web analytics. Some major player includes Google Analytics, Mixpanel, Adobe Analytics, etc. They have their free plans but have limited features and we don't own our data.
Here comes **umami.is** for the rescue - it's free, open-sourced and no data will be compromised as it's self-hosted. Umami has everything to get you started with web analytics and you will definitely love its simplicity. Let's see how it looks.
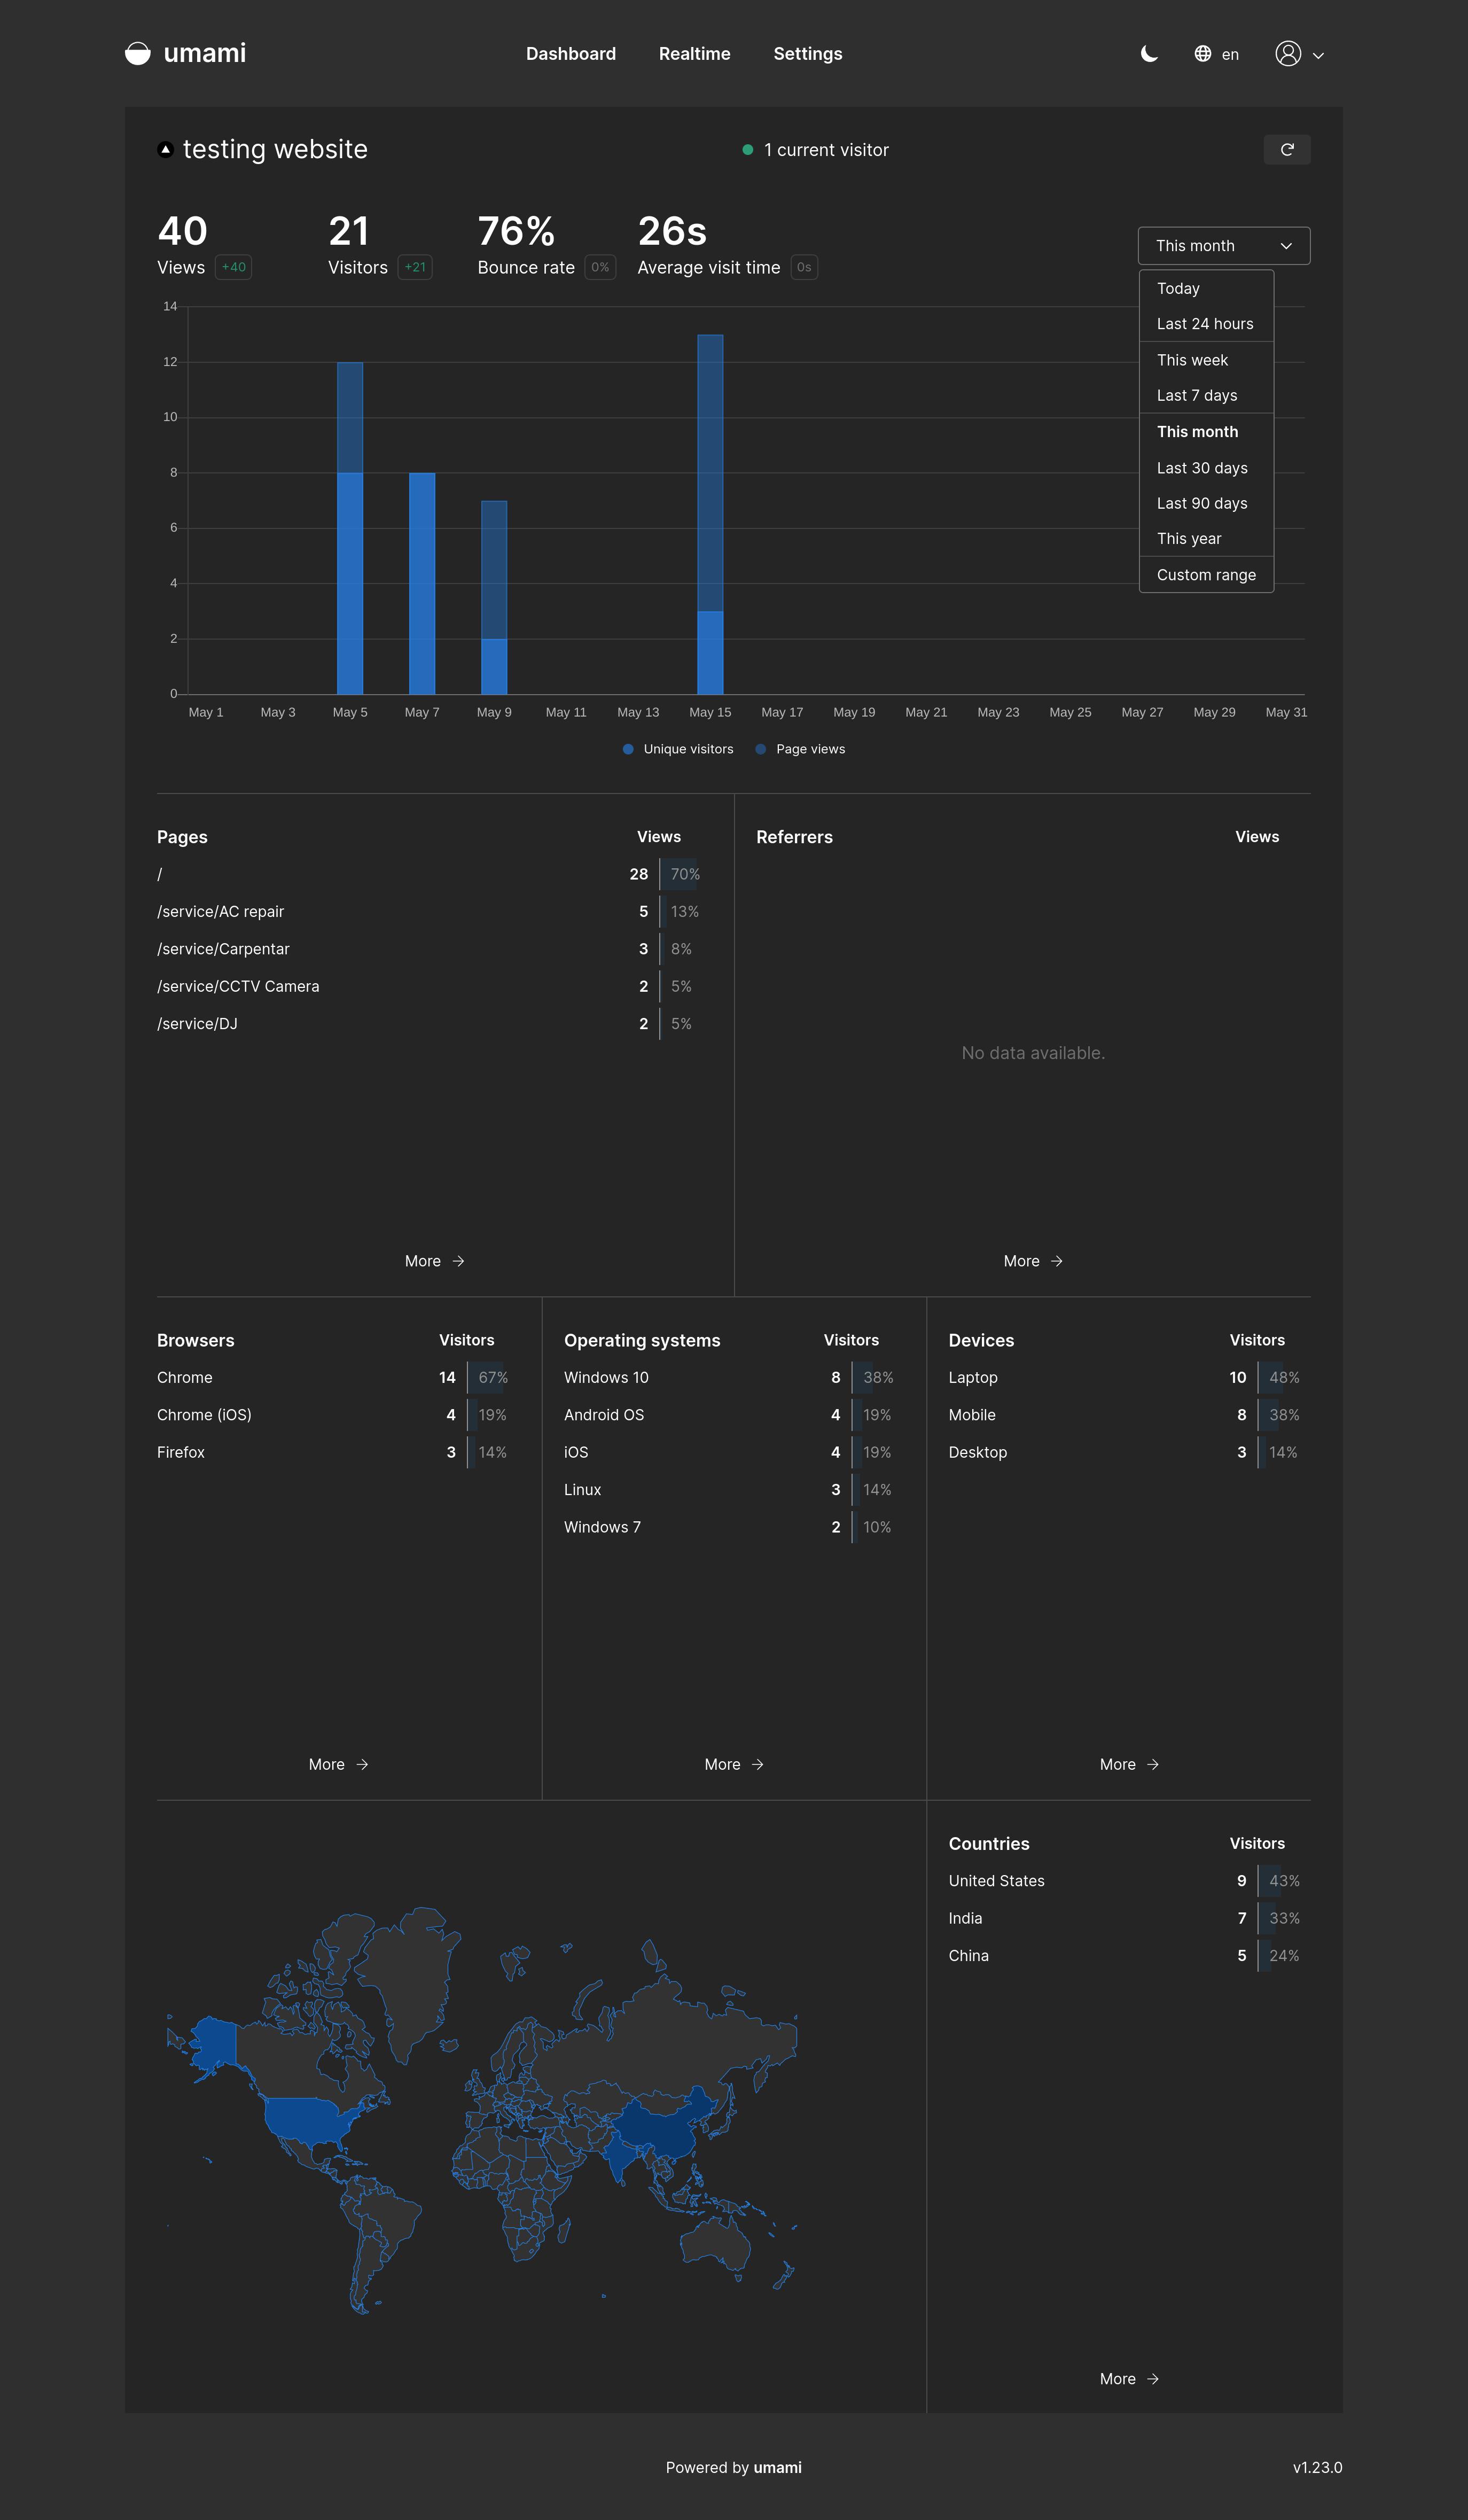
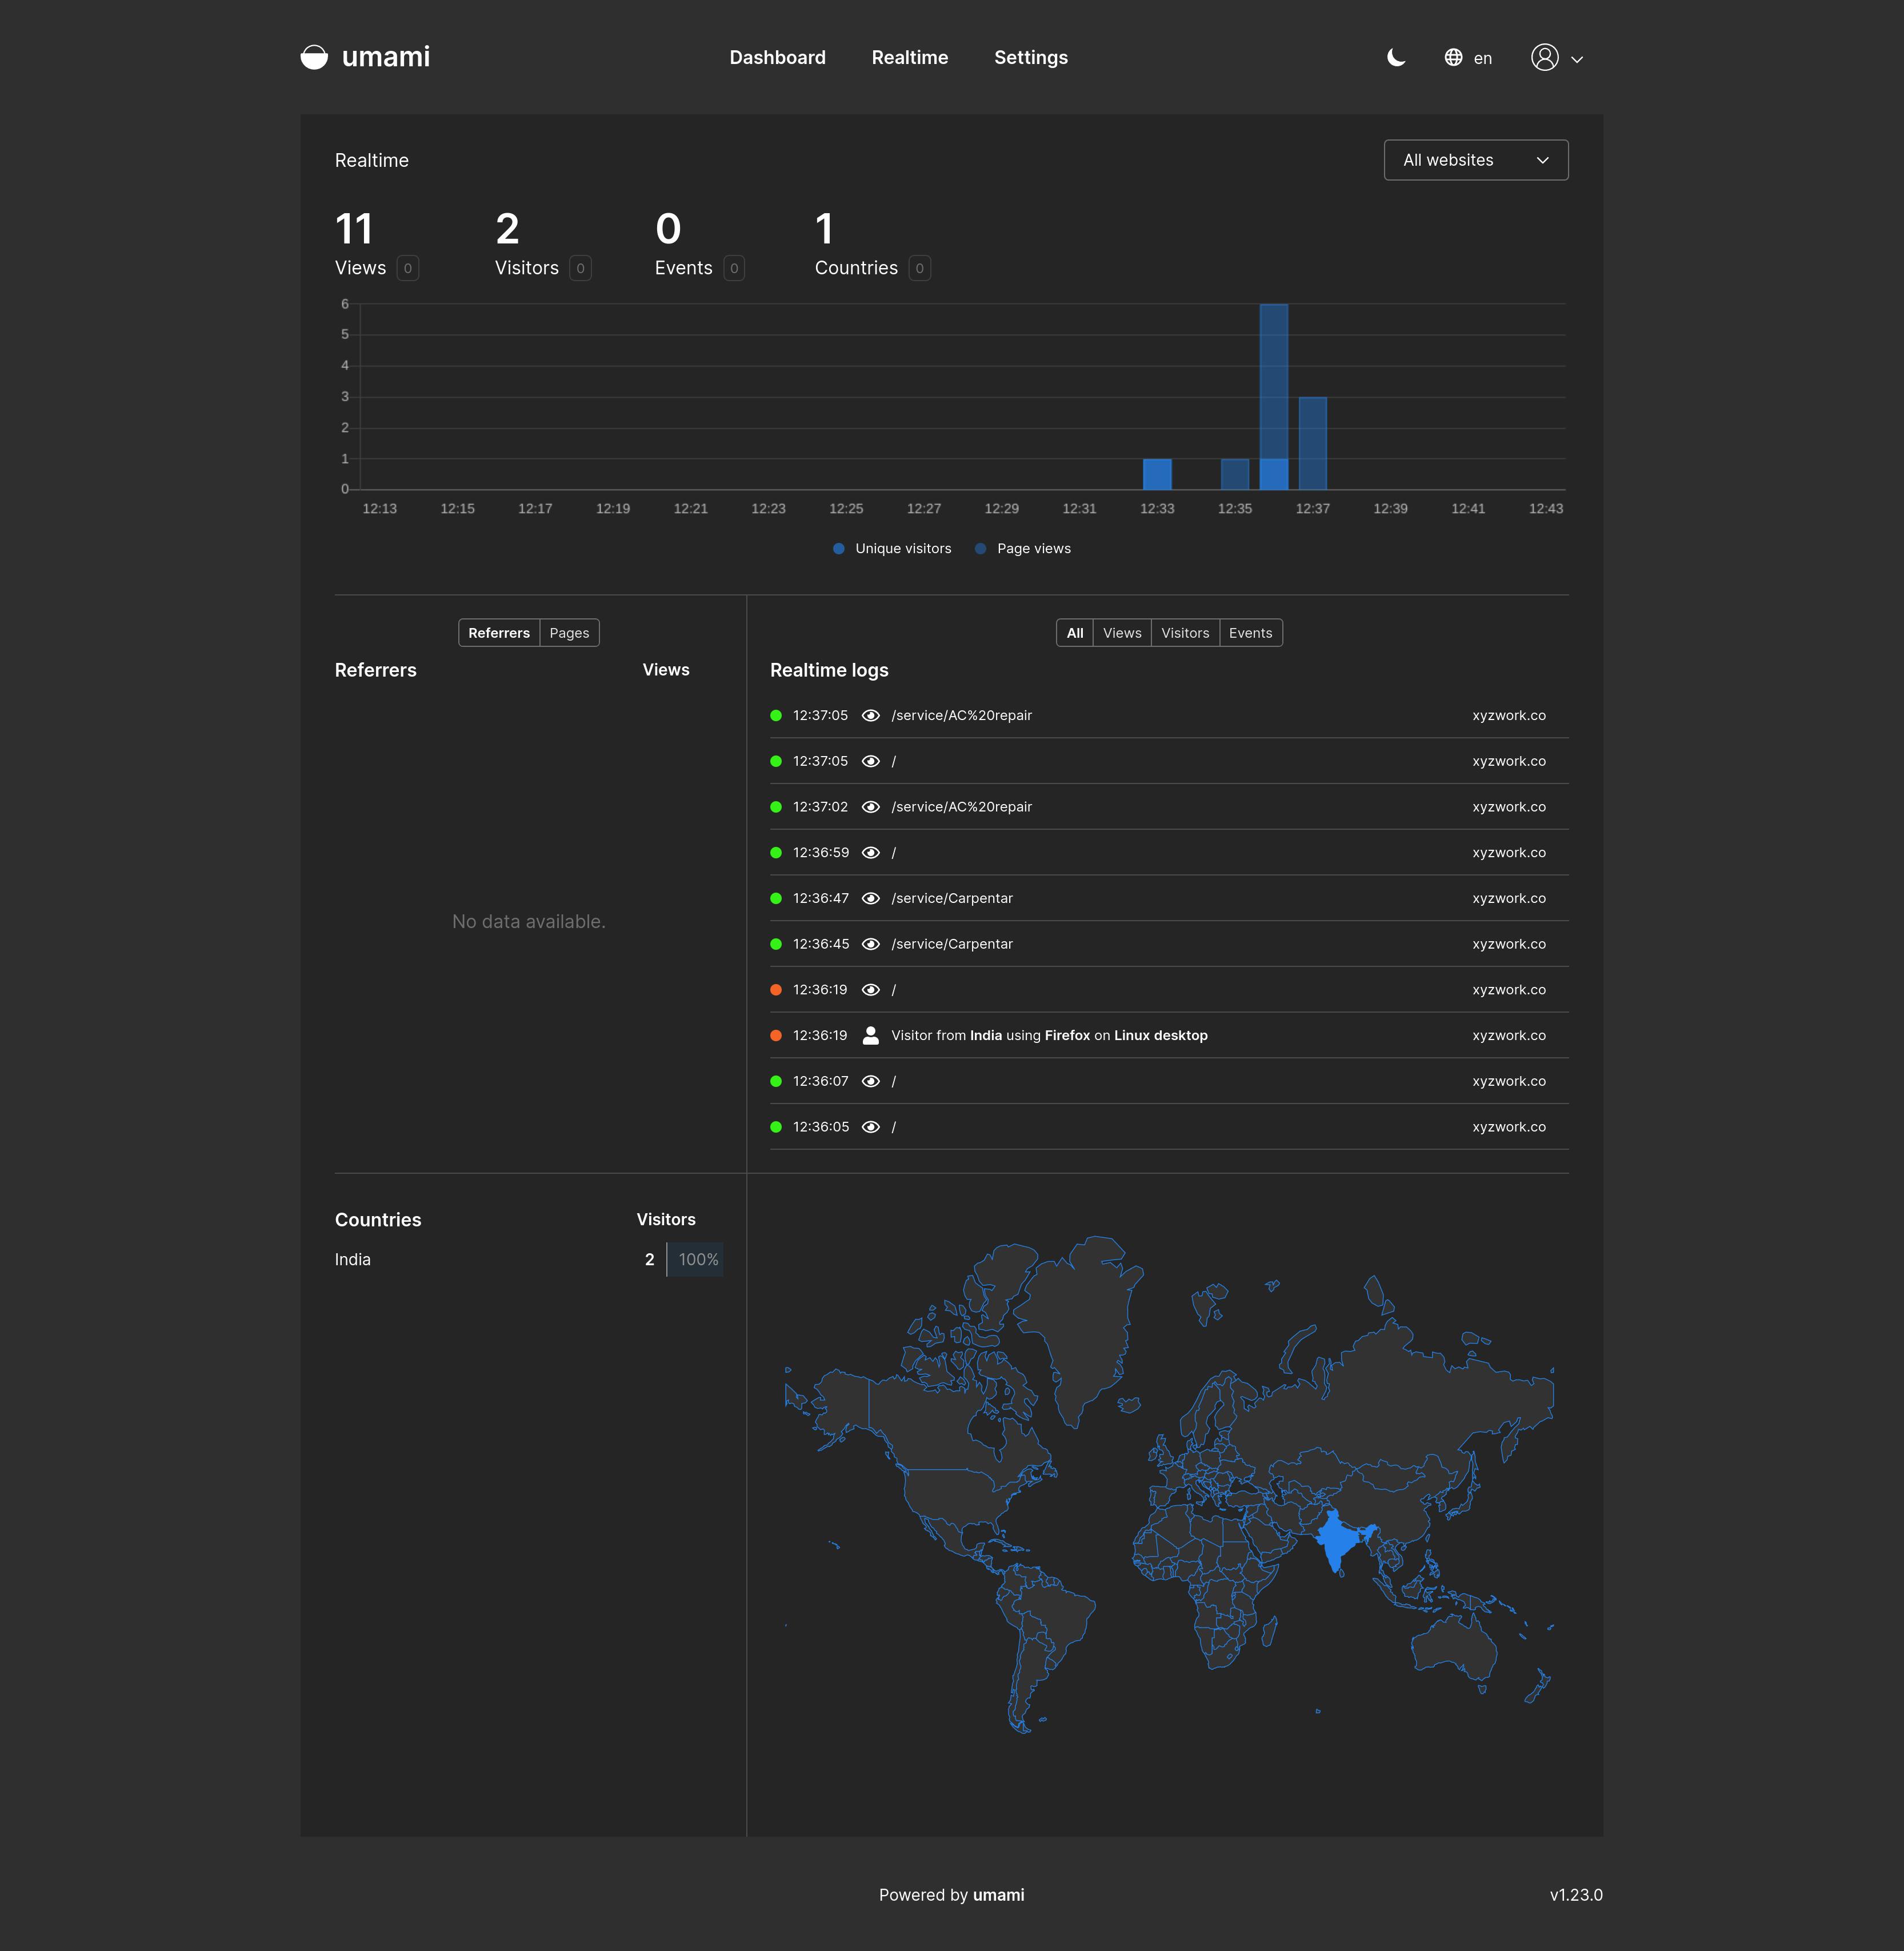
Also, it provides real-time page views with log events.
🚀 Host Umami
So let's get started by hosting Umami and adding analytics to our very first site. It is pretty simple, let's see the flow below :
Firstly we need the Umami core repo, you can clone it from here github.com/mikecao/umami
Secondly we will need a Postgres/SQL database for storing and retrieving analytic data. Run these commands on the cloned repo to configure your database. This will create a DB locally.
 // For Postgres
 psql -h hostname -U username -d databasename -f sql/schema.postgresql.sql

 // For SQL
 mysql -u username -p databasename < sql/schema.mysql.sql
We are almost done here, just add a .env file to your cloned repo.
 // Contents of env
 DATABASE_URL=(connection URL)
 HASH_SALT=(any random string)
Below is the connection URL for Postgres and SQL:
 Postgres -> postgresql://username:mypassword@localhost:5432/mydb
 SQL -> mysql://username:mypassword@localhost:3306/mydb
Build and Run 👍
npm run build && npm startNow it can be hosted anywhere, Congrats !!
💪 Hosting Umami in one click
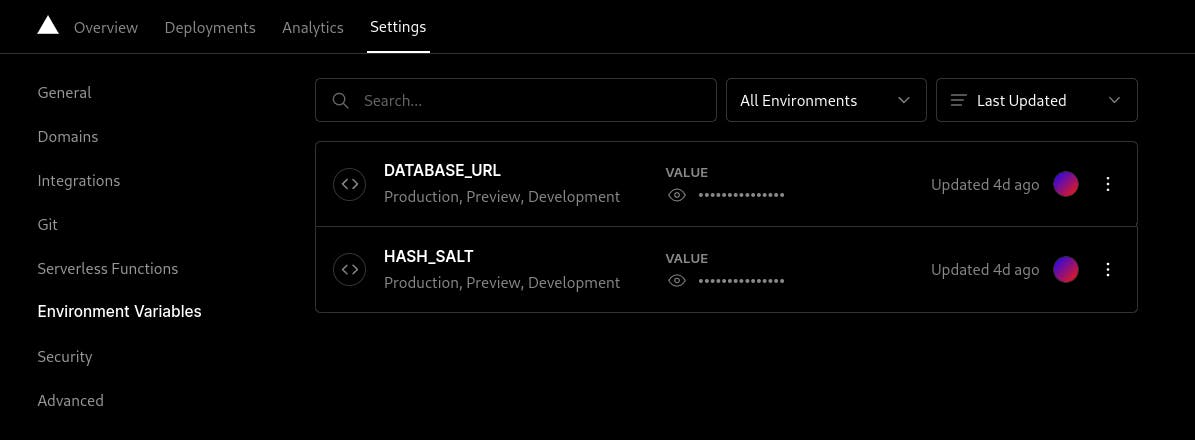
Or host your Database first and then deploy Umami on Vercel, AWS, Netlify or any of your favourite platforms. Just make sure to add "DATABASE_URL" and "HASH_SALT" as environment variables.
Below is the attached screenshot of adding the Environment Variable in Vercel. Go to Project > Setting > Environment Variables
🤷 What to do after deployment
The default Username and Password to log in will be "admin" and "umami" respectively. You should change the password from Settings > Change Password > Add new password.
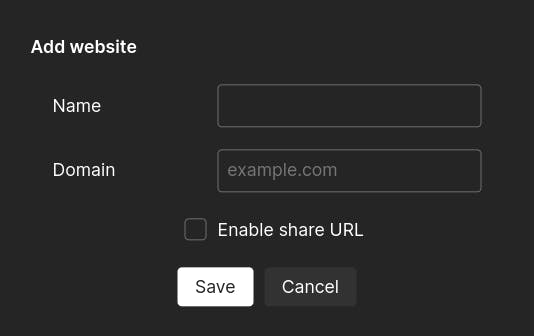
Add a new website from Setting > Add Website > Add name and website's domain. Here you can also make the analytics publicly available if you check the "Enable Share URL" button.
Click on the </> button to get the tracking code, it will be a Script tag.
Add the script to your website code.
- It can be added in a javascript file if you are building a basic HTML site.
- Add it to index.html in Reactjs code.
If you are using Next.js, the script needs to be added between the Head tag. It also needs to be imported from "next/head".
<head>
    ... umami script tag ...
</head>
Voila, visit your site and see the graph change in Umami dashboard 🎉
🙏 Thanks for reading this blog, means a lot to me
Feel free to reach out to me on twitter or Linkedin in case of any queries. Drop a star ⭐ on Umami's Github repo here to show some support. Don't forget to react to this blog if you liked it.
Resources